Posts

Showing posts from April, 2021

Fantastic Voyage: Making The Models In 3D, Darwin's University And Animals

Image
 Today I created Darwin's University which is seen for a very brief amount of time in the animatic. For this reason I made a very blocky version of the scene for the pre-vis. I can decide to add more detail to it later for the real version.  As the university model was very basic I also made the animals which are seen on the Galapagos Islands. I used the concept drawing I drew as a guide for each animal. 

Fantastic Voyage: 3D Continued, Beach Scene

Image
 Today I created the beach scene. This is seen in the animatic when Darwin arrives on the Galapagos islands on the HMS Beagle.  I used the same method as before when making the island overview scene. Using the soft select tool, I pulled up the vertexes of a flat plane which I gave a lot of edge loops. I extruded up, moving left and right in an attempt to create a cliffside like shape.  Once I had a cliff which I was happy with, I then began on the floor. I added in boulders which I randomly generated using a Maya plug-in. This saved time and made boulders which were natural as they were each unique. Finally I created the water and imported the boat into the scene.  I am happy with how this scene turned out, which is important as it will be seen quite a lot in the final animation. I liked bringing the boat in as It feels like my ideas are finally coming together. 

Fantastic Voyage: 3D Continued, Dino Bones And Island

Image
 Today I made some bones from the scene where the ghost explains how we proved Darwins theory of evolution.  The model was based off of a Archaeopteryx, the dinosaur used to confirm Darwin's theory, giving it the name "first bird". The model didn't really need to look like the bird too much, as this was not essential knowledge for KS1 to know. As long as the model was easily distinguishable as dinosaur bones, it was good.  As the fossil was easy to make, I also made the Galapagos island model. This is used in the animatic to give an overview of one of the islands. I used the concept art I had created as a reference, and used the soft select tool to pull up the vertices on the image plane I created. This made the hills and mountains. I then smoothed the model. 

Fantastic Voyage: 3D Continued, Darwin's Room

Image
 Today I made Darwin's room, which is seen in the animatic while the ghost is explaining Darwin's childhood. In the animatic this is seen in a time laps. I'm not really sure how I can transition this idea into 3D, however it does mean there will need to be 3 versions of the room to represent the different points in Darwin's life.  I made an array of different furniture to be used at different points in his room, trying to stay faithful to the animatic. Nothing seemed particular hard to make as his furniture was quite blocky shapes. I used the pre-made man model to ensure everything in the room was the right size.  I then used the furniture in the room to construct a room for the scene when Darwin receives a letter and writes his book.

Fantastic Voyage: Continuing The 3D

Image
 Today I made the model for the HMS Beagle. The version I will be making does not have to be super detailed, however I still want to include certain details, such as the Beagles paintwork, which allow the students to identify what the boat looked like. At first I struggled to think of how to make the main body of the boat, even with the orthographs I had drawn. I decided to look at some low poly boat models on the internet in order to get inspiration (below). I decided to start with a cube at the centre of the boat and extrude out the edges until I got a shape I liked. After a few attempts this worked.  To make the sails I extruded out the edges of another cube and then used the lattice deformer to give it its shape. I then duplicated the sale many times and matched the placement with the orthograph. After making the boat, I used the cut tool to form the patterns of the Beagle. I then Assigned the faces of the boat the appropriate colours. I really like how this model turned o...

Fantastic Voyage: Beginning The 3D

Image
 Now that all of the orthographs are drawn I am able to move on to the 3D. I started with Darwin house which was quite easy to make as it mainly consisted of different sized cubes. The orthograph helped to make sure the asset was the right size and accurate. 

Fantastic Voyage: Continuing the Orthographs

Image
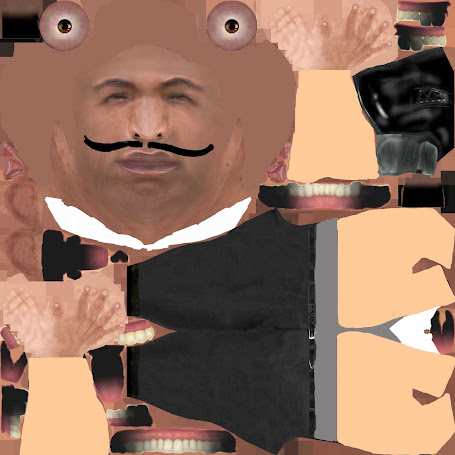
 After looking through the animatic again, the only other orthographs I feel I really need to draw are for the two characters, Charles Darwin and Ghost The Host. As it is a pre-vis, I am going to use the pre-made character and retexture it. This will allow me to create a solid outline in the pre-vis and help me to get started on the real thing as soon as possible.  I didn't put a lot of time into his design, as it is only meant to be an indication of who he is in the pre-vis. I like how his beard turned out, an might take this idea into the final design.  Below is the orthograph for the character Ghost The Host. It was a bit hard to draw the same image from each side, however it gives me a rough outline as to what I need to aim for when in Maya. 

Introduction To Maya: Creating Textures

Image
 Today we created a tile-able texture in photoshop Select the section of the image which is the most generic. This can then be repeated without looking repetitive. Once I had taken 1024 image of brick, I then had to further edit the image to make it less repetitive.  changed the colour of the image. duplicated the brick texture and turned on luminosity. Then made the above image black and white with the channel mixer. Next I applied a highpass to the brick texture.  Next was to reduce the variety between the bricks. This was done using the patch tool Then used the clone stamp tool to cover up any distinct cracks or blemishes. In order to make the image tile able, I had to set the offset to 512. This moved the edges to the middle.  Tidied up Offset brick This is the image in maya before tileing The texture has obvious repeating bricks an dark spots which   Specular map Bump Map

Fantastic Voyage: Orthographs For 3D

Image
 Now that I have completed the Elevator pitch, I can now begin making the 3D pre-vis version of my animatic. I firstly need to create orthographs for some of the hero props to ensure I am able to accurately translate their designs into 3D As I will be making a pre-vis, the models do not have to be perfect, however It will create less work in the future and give me a better understanding of how the animation will turn out if I am able to create good quality assets now. This will mean only minimal changes will be needed when it comes to the final animation. Today I focused on creating the orthographs for Darwin's house and the HMS Beagle.  These are the two main props apart from the main characters. The HMS Beagle orthograph is particually useful as it is quite a complicated design. The orthographs helps to break down each stage. 

Fantastic Voyage: Elevator Pitch

Image
 Topic: Evolution What Is An Audience? To begin, I want to firstly understand what an audience is. An audience is a collected group of individuals who consume any type of media. They are the people the product appeals to and are the ones who will purchase it. If there was no audience, companies would have no one to sell to and so there would be no profit. Companies must learn to adapt with the times, meaning they must always put the audience's needs first in order to have a successful product. An example of this is news papers. With the rise of technology, news paper companies have had to find a way to digitize their paper in order to keep up with their audiences needs. You no loner have to travel all the way to a shop and pay for a physical newspaper and can instead access it form any device through the internet. To further capitalize upon this many if not all news companies have their own, easy to use app, which has been further developed to send personalised articles to the user...