Posts

Showing posts with the label Photoshop

Toolkit 1: Friday Workshop Lessons (ALL LINKS)

 Adobe Photoshop Lessons: Introduction To Photoshop Introduction To Photoshop: Editing Photo's Introduction To Photoshop: Gif And Thumbnail Making Introduction To Photoshop: Learning Tools In Photoshop And Illustrator Introduction To Photoshop: Making A Matte Painting Part 1 Introduction To Photoshop: Making A Matte Painting Part 2 Adobe Illustrator Lessons: Introduction To Illustrator: Making A Pizza Slice Introduction To Illustrator: Creating A Comic Strip Adobe Audition Lessons: Introduction To Audition: Charlie Chaplin Audio Adobe After Effects Introduction To After Effects Adobe Premier Pro Premier Pro Padlet Link For Additional Work Under 'Ronnie' https://padlet.com/cpeters41/CAAyr1 Reflective Statement At the beginning of the course, I had very little experience with any of the software above. However after completing the tutorial lessons I now feel confident enough to use all of the software in order to produce  a piece of work. Proof of this is the many projects I...

Introduction To Photoshop: Matte Painting Part 2

Image
 Today we took the matte painting of the mountain scene from last week and turned it into a matte painting using images. The main way of doing this was by using layer masks tool. You line up the images with the original drawing and then manipulating them to fit the shape. The image is then pushed around with the transform tool to fit the direction the original shape is going in. I really like this process of making a matte painting as you can start off drawing a rough shape of a scene you want to make and transform it into something which is quite detailed.  By completing this task it helped improved my overall skills in photoshop.  Original image from last week  New image

Introduction To Photoshop: Matte Painting

Image
 Today I followed a video tutorial explaining how to create a matte painting in photoshop. I was eager to complete this task as we need to complete a matte painting for our project.  The way this was done was by building up the layers, starting from the front and moving back. Using the lasso tool I created a shape which looked like a cliff side. I didn't have to be perfect and could be altered later. I then continued this process for the rest of the hills. Using the adobe colour themes I was able to colour each of the hills in the same way the video shows. I chose the colour green however based off of the final image you can see that I changed this later. Once the scene was created I then went around and created the trees, using an image I found on the internet. I created a stamp which we learnt to do in the previous lesson. This enabled me to switch between the layers and create trees of the appropriate colour for that layer. I then finished the image by adding the misty effe...

Introduction To Illustrator: Creating A Comic Strip

Image
 Today I continued to work in Illustrator, creating two different comic strips. The first one came with the images already set up in a separate file and simply required me to position them in the correct place. This got me used to Illustrators ability to let you have assets off to the side of the screen. It also required me to make multiple different shapes to fit the grid and colour them appropriately. The next task required me to do the same thing, this time however I had to take the parts of the picture I wanted from the image myself and then apply it to the grid. To add the image to the grid you roughly line the image up until your happy and then go over the edge using the pen tool. Once you are happy with outline you then create a clipping mask. This was then repeated for the rest of the images. I took some of the Godzilla images into photoshop and edited them to fit the black and white art style of the other images at the start. Overall I feel even more confident using both I...

Photoshop And Illustrator

Image
 Today we continued learning the tools in photoshop. Below are two images I made using the mask and select tool, combined with different types of brushes.  After completing the Photoshop work we then moved on to illustrator just to refresh on how to use the pen tool. This is an essential tool which we will be using a lot and so we need to understand how it works. Below is a worksheet which shows different ways of using the pen tool to create the correct shape. 

Invisible cities Drawing Process

Image
 

Diomira reflection

Image
  I am really happy with the final images and the way my project has come together. However, at the beginning of the project I felt very overwhelmed by the amount of thumbnails I had to produce.  It took me longer than I expected and I now realise that I must get quicker in producing my drawings.  I switched from digital drawings to traditional sketches to try and speed up the process and this helped me.  I am also very disappointed with the scan images I have uploaded and I now know I must spend more time uploading my work.  In all honesty this project has been a race against time but a massive learning curve for me to prioritise and timetable my workload more effectively.   I enjoyed coming up with a concept for my City and I am very pleased with the end result.  I hope that I have shown the story enough in the images which was my main goal.  However, I can see that I need to work on my colour images as I feel as soon as I added the colour ...

Diomira Research: City Detail Analysis (Google Docs Version)


Diomira: Researching Source Material (Continued Google Docs version)


Diomira Research - sketches relating to analysis (art of)


Animated Gif Of 3 Digital Paintings

Image
 

Diomira: Research Into Source Material


Diomira Research: City Detail Analysis

Image
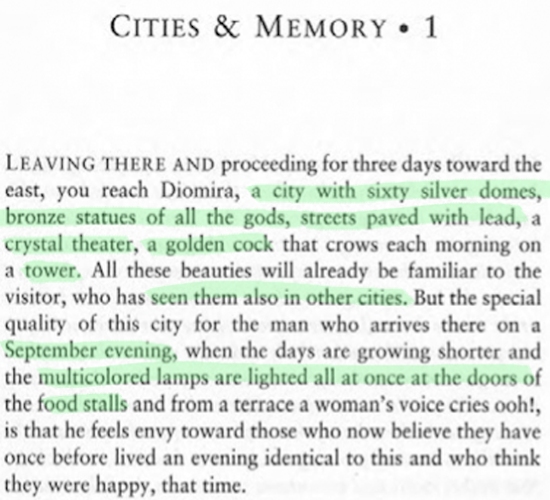
Next I made a list of things stated in the text which needed to be shown in my city Sixty Silver Domes Bronze statues of the gods Lead streets Crystal theatre  A golden cock  Tower September evening Multicoloured lamps Food  stalls  Before begging my final three sketches, I must first investigate how each of the things stated above will look. This will help create an aesthetic for my city as well as ensuring I explore each idea. As I learnt from my thumbnail drawings, your first idea isn't necessarily your best idea.  I started by looking at the most prominent detail about the city, the silver domes. One thing that is worth mentioning first however, is the fact that the text never mentions any form of house apart from domes. We are left to assume that the houses the people live in are the domes, however to follow the story concept I have made for the city, I want the rich to live in the silver domes and the poor to live in 18th century houses. This will show a s...

Introduction To Illustrator: Pizza Slice

Image
 Today we were introduced to another adobe software, Illustrator. Illustrator is very similar to Photoshop from how its presented, however it offers an advantage over Photoshop for creating clean graphical illustration's, which will be used for things such as logos. Illustrator mainly works in shapes, so its about manipulating shapes into an image rather than painting. The nice thing about Illustrator is the fact that you have a workspace surrounding the canvas, where assets can be placed. This provides a more clear workspace and helps when an asset is needed multiple times throughout the work. For our first task in Illustrator, we had to make a slice of pizza. We were given a reference picture of the slice of pizza we would be working over so that its the right size.

Intro To Photoshop: Gif And Thumbnails

Image
 As a requirement for our invisible cities brief,  we have to show the process of our city drawings as a looping GIF.  After finnishing the gif we were then given some time to catch up on any work from the project which we need to do. I chose to draw the thumbnails for my cities.  These thumbnails were drawn quickly with a mouse however you get a clear idea of how to make a thumbnail quickly in photoshop. As we have to draw a 100 thumbnails, sometimes you can only make minimal changes to an image in order to explore a new idea. For example the thumbnail below is simple mirrored, however it offers a new perspective of the image. 

Digital Painting Exercises

Image
In order to practise drawing digitally, we were tasked with drawing an environment in black and white.  We focussed on just using black and white for a less detailed version then adding colour to show a more detailed version of the same image. These are the images I created for this task.  I chose the one which used the most colour as I wanted to practise drawing in colour.  

Invisible Cities Thumbnails

Image
Although I took a lot of time drawing these thumbnails I was very disappointed with the scanned results.  This is something I have learnt and will investigate how to improve the quality for my next project.   This is my first attempt at drawing a thumbnail.  I found it took far too long to produce a single thumbnail digitally so I decided to sketch the rest of them on paper, although I did prefer the finish of the digital version. These are my initial sketches to gain an understanding of what a thumbnail needs. This first page includes Diomira and Baucis.  They are my initial thoughts when first reading the description.  I used inspiration from Star Wars to draw Diomira as it made me think of the dome like buildings and I liked the concept of Baucis. This includes Diomira images which continued from my original thoughts as well as Esmeralda.  Esmeralda sounds like an interesting City however, it was very complicated to fit an idea into a single thumbnail as...