Posts

Showing posts with the label Animation Principles

Toolkit 1: All Animation Lessons With Nat (ALL LINKS)

 Lesson 1, Face Morph -   Getting Used To Animation: Face Morph Task Face Morph Task (Continued) -  Getting Used To Animation: Animation Morph Task (Update) Face Morph Task (Continued) -  Getting Used To Animation: The Morph Task (Face To Mushroom) Face Morph Task (Final) -  Getting Used To Animation: Face Morph Task (Finished) Lesson 2, Timing And Spacing -  Animation: Pendulum, Timing And Spacing Lesson 3, Timing, Spacing, Weight, Arcs, Squash & Stretch -  Getting Used To Animation: Squash And Stretch Artist Review -  Lotte Reiniger, Don Hertzfeldt Lesson 4, Timing, Spacing, Weight, Arcs, Squash & Stretch, Follow Through & Overlapping Action   Introduction To Animation: Character Squash And Stretch Lesson 5, Walking Animation -  Introduction To Animation: Walking Animation Lesson 6, Running Animation -  Introduction To Animation: Running Animation Lesson 7, Throwing Animation With And Without Antic...

Introduction To Animation: Lip Syncing Exercise

Image
 Today we were tasked with animating a scene containing dialogue.  I was provided with a worksheet displaying different shapes the mouth makes when saying a particular letter. I had to listen to the audio carefully and assign the appropriate mouth shape to the animation frame so that I could identify what to draw for each frame. Now that I had identified what to draw for each frame, it was now the case that I had to draw each mouth shape. I could then copy the drawing to the appropriate frame each time it was needed.  Overall this task seemed daunting  on the surface, however after breaking down each step, It turned into a manageable task. I was surprised how quickly I was able to finish the mouth animations, which was easier than I thought it would be.

Introduction To Animation: Animating A Plant Sack

Image
 Todays task required us to give human actions to an inanimate object. The object in question was a plant sack. This was an interesting task as the plant sack does not have any human features and so I had to find other ways of humanising it. 

Introduction To Animation: Throwing Animation

Image
  This week we were tasked with creating a throwing animation which showed anticipation. Anticipation is the moment before the ball is actually thrown. Its a visual cue which shows the view that an action is happening and is usually overexaggerated for the sake of the viewer. The results of the thrown are almost always dictated from the anticipation beforehand, prompting the viewer to expect a certain outcome. I started the task by attempting to complete a stick figure version of the animation. This however went  very poorly. I ended up adding too much build up to the throw by mixing my own ideas with the example animation provided. This resulted in a choppy animation which didn't make sense. I decided to try again, this time using a reference image for the key points in throwing a ball. I then added in additional frames to emphasis the anticipation. 

Introduction To Animation: Running

Image
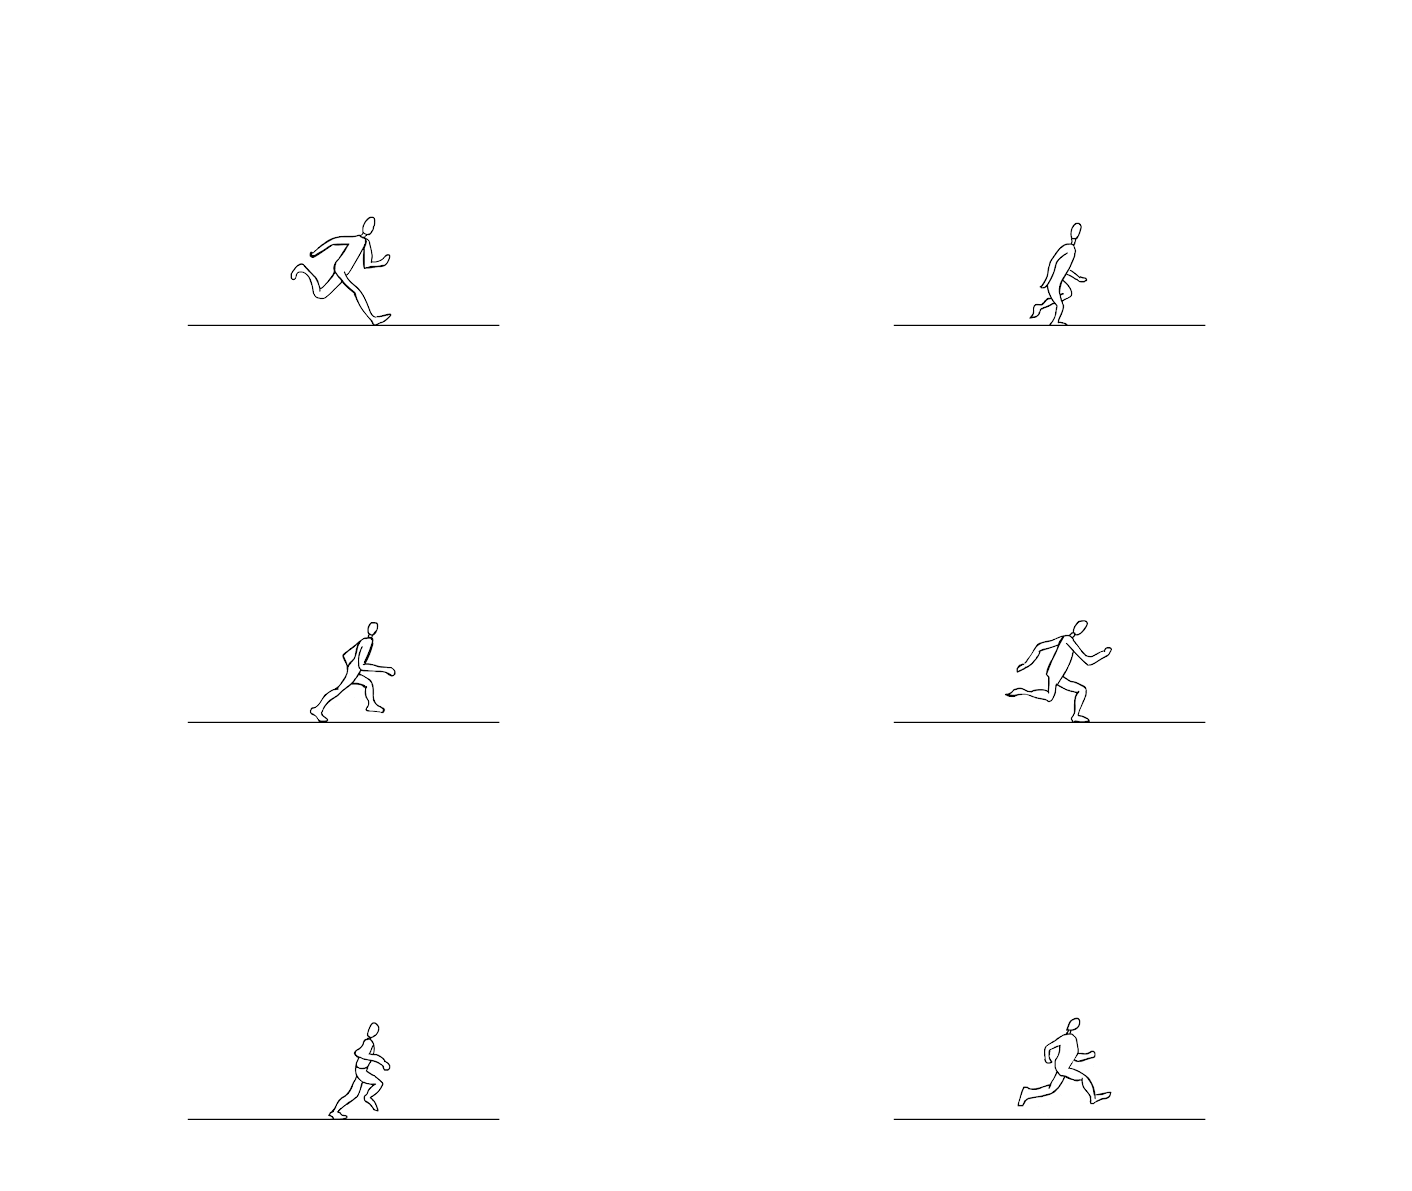
 This week we completed a characters running animation. This was very similar to last weeks walking animation, however it required less frames as the character is moving faster. I found this one easier to visualize in my head because of this and completed the task quickly.  The image above is the animation shown at 24 FPS and the one below is shown at 12 FPS. Like last week, we also had to show the character running across the screen. This was a lot easier to do now that I knew where to place each frame. I simply had to repeat the process 3 times. The image above is at 24 FPS and the image below is at 12 FPS I am pleased with the results and feel more confident animating human actions now. 

Introduction To Animation: Walking Animation

Image
 Today we were tasked with completing a full walking animation for a character. I started with just a simple head and ground guide, which made it appear as if the character was floating. I did all of the head animations first to ensure the character was spaced correctly in a way which looks natural when walking. I was then able to add in the body and legs on a separate layer, using the worksheet provided as a guide, explaining when the contact points were.   This was simple enough to do and only really required that I drew the first half as the second leg is just the first one flipped. I was able to copy the first half and then draw over the legs which saved a lot of time and ensured the animation looked similar. I then moved on to the arms. Again all this required was that I followed the worksheet provided and remembered the arms go in an opposite direction to the legs.  I then gathered up all of the drawings and placed them in line with each other. This created the...

Introduction To Animation: Character Squash And Stretch

Image
  For this lesson we were tasked with adding parts to our squash and stretch ball in order to begin understanding secondary animation. This is animation which is happening alongside the main animation. I initially did this by simply adding eyes to my squash and stretch ball. 

Animator Reviews

Image
 Lotte Reiniger Lotte Reiniger is a German film director who was active between 1919 to 1980, with her first production being The Ornament Of The Lovestruck Heart. She is considered to be the foremost pioneer of silhouette animation and know for inventing the multiplane camera, an invention that she would  use to create her animations. The camera moves the artwork for the animation across the screen at different speeds and distances, creating a sense of depth to the image.  Reiniger's work as a whole is really engaging to watch, relying mainly on the visuals and music to tell a story. This really demonstrates the importance of how you choose to display your animation to the viewer. Reinigers animations are easy to follow as they feature distinguishable objects which the viewer can relate to and structure them in a way that is easy to digest. Due to the boldness of the models, you can really identify what you are looking at. This is also combined with a detailed cut out wh...

Getting Used To Animation: Squash and Stretch

Image
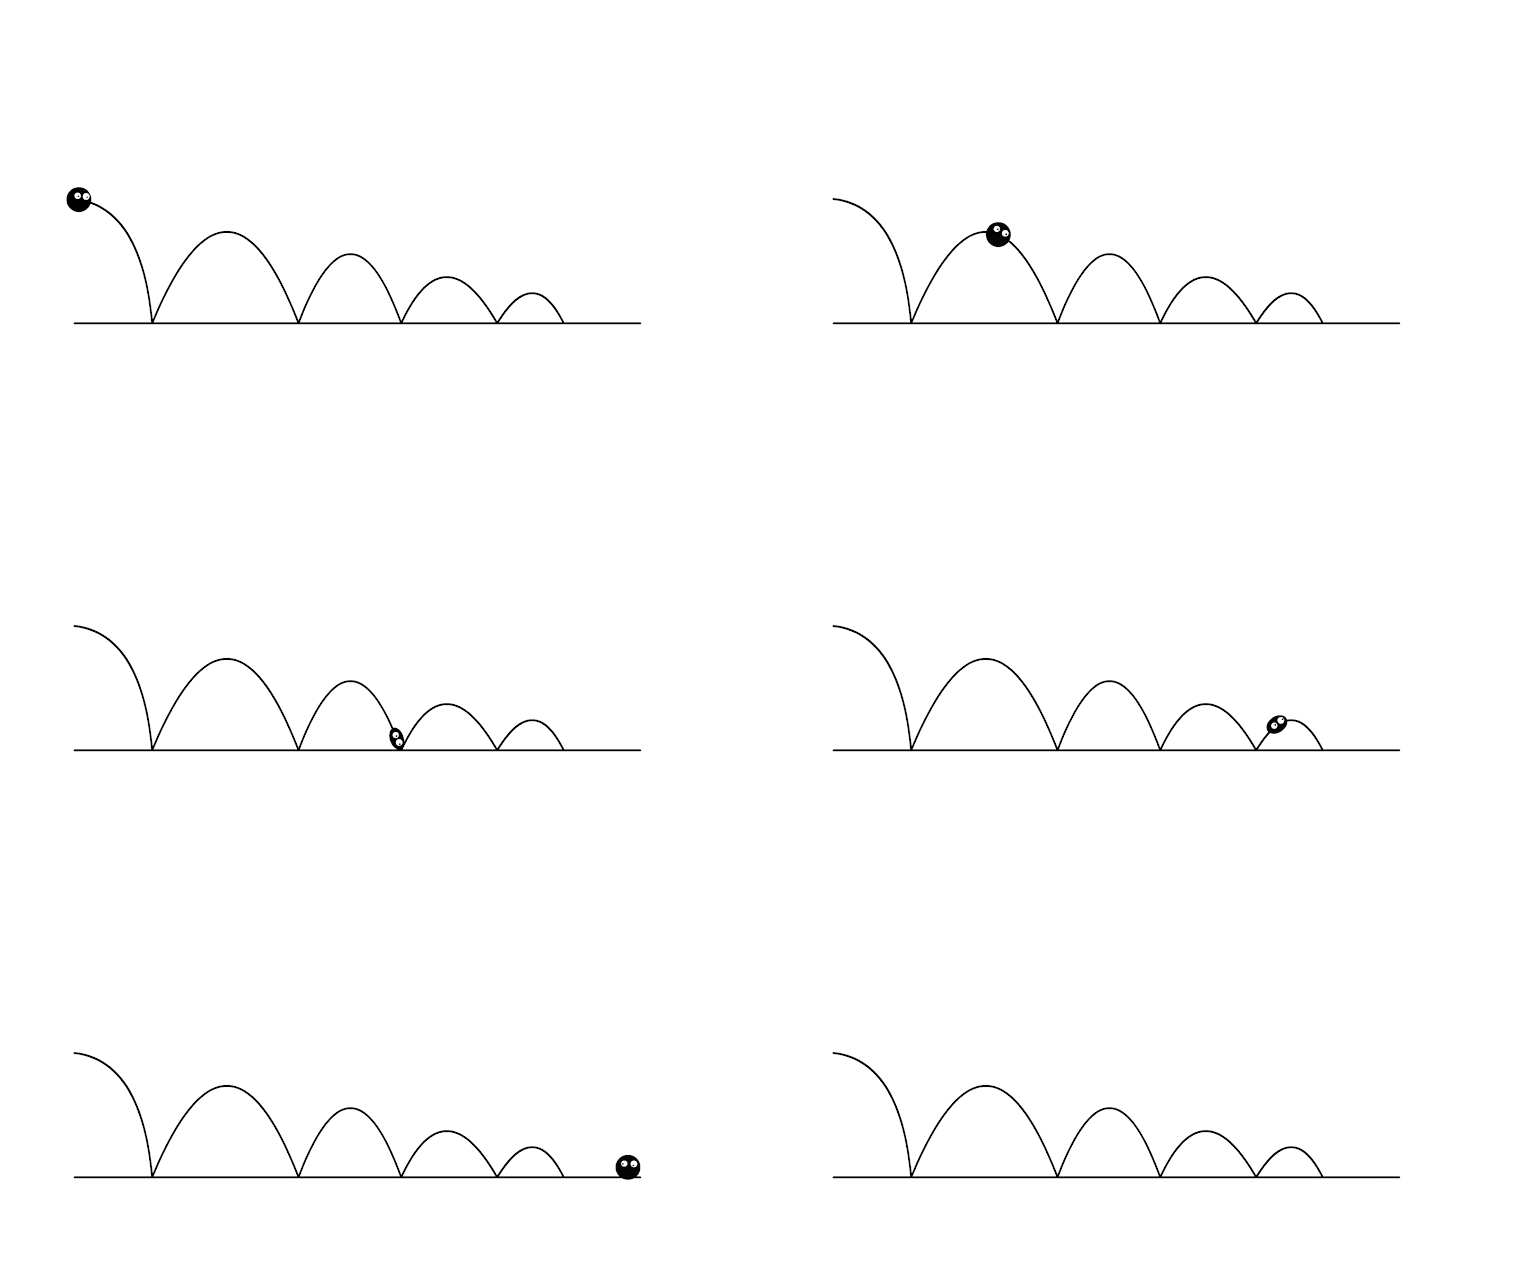
 This weeks animation lesson built upon the use of arc, timing and spacing, as well as adding in squashing, stretching and weight. The first task required us to demonstrate a cartoon ball, bouncing across the screen. As it was a cartoony ball, you are able to exaggerate the squashing effect when the ball comes in contact with the ground. The use of the arc made it easier to time the movements of the ball. making it seem like a more natural progression. I feel like the only thing that needs improving is the amount I squish the ball near the end of the animation. As the ball looses its speed, it will also lose its impact, making it squash less. I feel I continue to squash the ball far too much making the last arc in particular look a bit odd.  For the second half of the task we had to show the falling of a ping pong ball, tennis ball and bowling ball onto a surface. By adjusting each balls timing and spacing, it allows you to give off the illusion of weight, with the heavier bal...

Getting Used To Animation: Morph Task (Finnished)

Image
 After completing the face to mushroom morph, I continued to work on the animation for the rest of the week. The final results are below. I really pleased with how the animation turned out and I feel like you can clearly see my skills with the animation software improve as the animation goes on. After completing the face to mushroom morph, I felt I needed to not only speed up the process but also look to morph the facial features in a more interesting way. I managed to drastically speed up the process of the mushroom to elephant morph by animating the mushroom until it was in line with the elephant, and then copy and pasting my drawing, adding small changes with each image. This meant I didn't have to draw the whole image again and could focus on the changes. Another important thing I learnt from using the software was it didn't really matter what your drawing looked like. I was spending far too long on a single drawing, which will not be seen for long. Unless there was a glari...

Animation: Pendulum, Timing And Spacing

Image
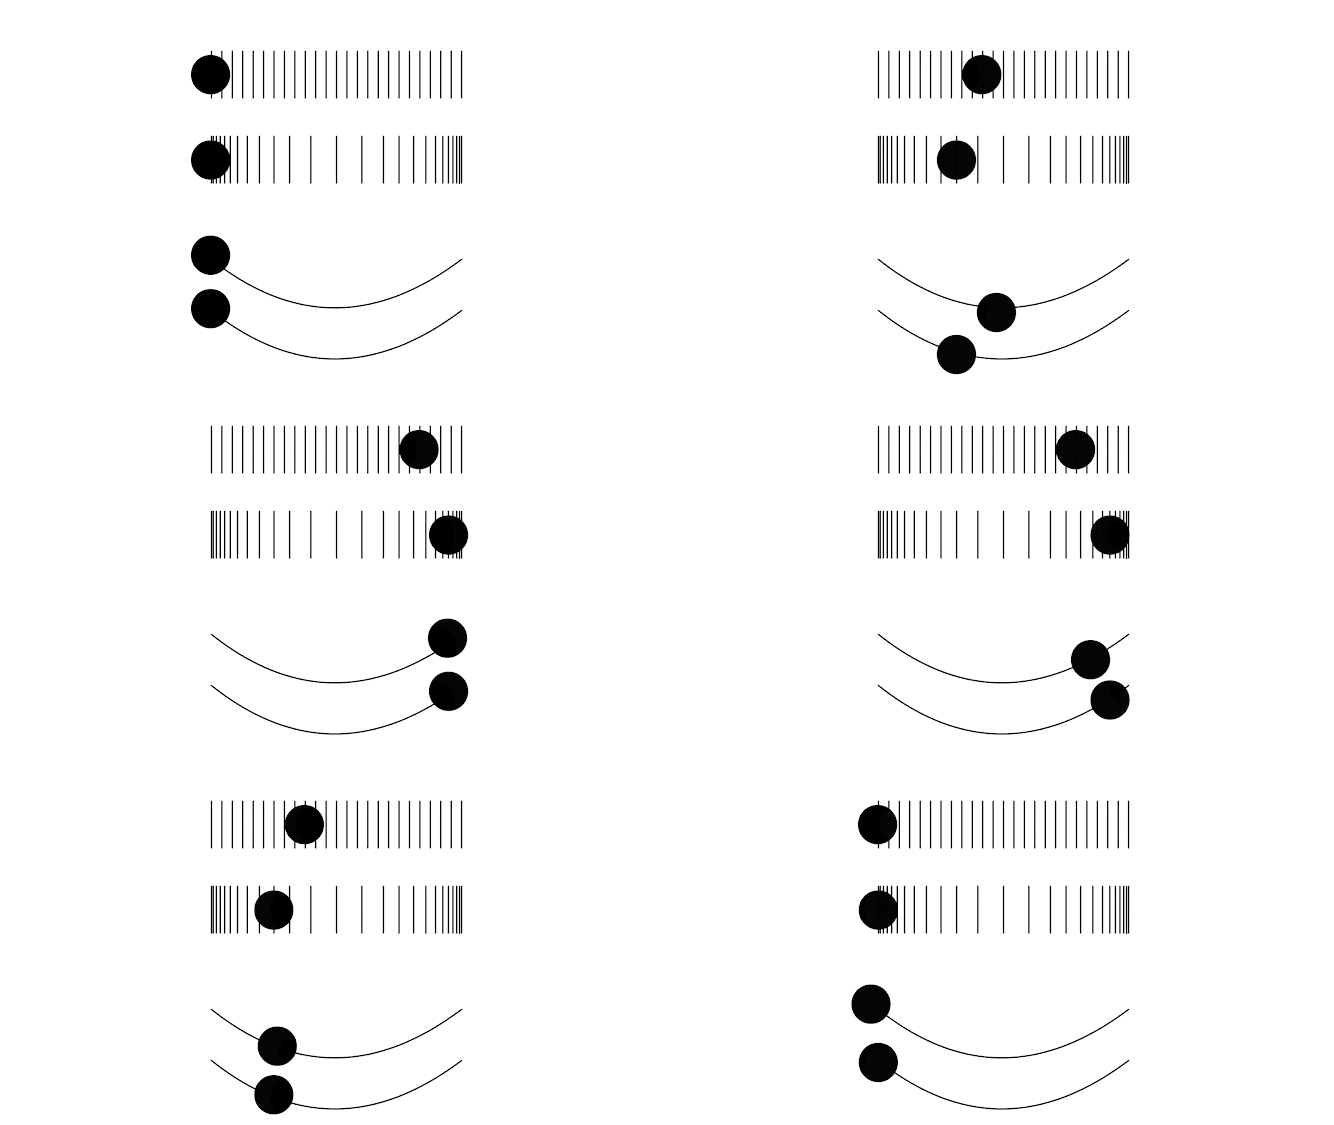
  Today we completed the pendulum task in order to understand timing and spacing within animation. The idea of this task is that you draw in the guidelines so that each ball is moving the same distance and meeting at the beginning middle and end, however the progression of each ball is different due to the guides having different middle sections. The top image shows a ball moving across in spaced increments and the one below it show the ball moving across in ease in/ ease out increments. The timing of each ball is the same, however the spacing is varied.  I found this task a lot easier compared to the morph task as there were guidelines for this animation. Whereas the morph task was very open to interpretation, this task had a straightforward goal. This task made me feel really comfortable using the F key shortcuts, which I used to complete the previous task however do not feel like I utilized properly. I am happy with the results however feel as though the firs...

Getting Used To Animation: The Morph Task (Face to Mushroom)

Image
After speaking to Nat and looking at how she did her animation loop, I felt more confident at completing my one. I also asked other students, if they were struggling with the task and asked to see what the had done so far. One person suggested if I continued to struggle with drawing from the middle, just to draw from the beginning, using the onion skin to see the image you are working towards and the previous drawing. This method seemed easier to me as it meant you could minor changes to the image instead of guessing what it should look like.                           After attempting the middle image method, I decided just to draw the image from the beginning. I felt like I was wasting time and knew I would get the same results regardless of how I completed the task. I just needed to choose the method that worked for me.   I preferred using this method to create my animation as you could see the progress yo...

Getting Used to Animation: Animation Morph Task (Update)

Image
When referring back to the three images I had drawn, I decided that there was something off about my self portrait, so I decided to play around with the scale tool to see if I could make it look better                                 Original                                                                 New The main change was to the neck, but I also changed the size of the nose slightly and made the edges rounder. I think these changes improved the original image. After making changes to the images, I then began to animate. As stated on the brief, its much easier to morph something if you start with the middle frame between the two. You then draw the middle frame between the middle and repeat this process moving outwards. A...

Getting Used To Animation: The Morph Task

Image
For our first animation lesson with Nat, we were tasked with creating a 3 second animation loop using the software Adobe Animate. The animation had to be digitally drawn and consisted of our self portrait morphing into a distinguishable item of food, then to a distinguishable animal and then back to our self portrait (this is what creates the loop). Before starting we were given helpful shortcut keys which would be needed to complete the task.  Ctrl + 2  - This center's the frame, allowing you to quickly see the drawing as a whole.  B -  This changes the cursor to the brush tool .This is what you use in animate to draw your animations. V - Changes the selected tool back to cursor, allowing you to select objects in the frame E - This switches the selected tool to the Eraser, Allowing you to correct things in the drawing F5 - This holds the frame you are currently working on and allows you to reuse it for as long as you want. Changes can be seen on the timeline. F6 - T...