Introduction To Maya: Rigging The Lego Car
In order to rig the Lego car, I first had to clean up the scene. This was done by getting rid of any unnecessary object and by grouping the appropriate parts of the car so that they could be edited independently. I made a group for the wheels to spin, the car to rotate and for the car to move.
In order to make controlling each part of the car more accessible, I made a control using a circle NURBS. I then went into the rigging tab and selected point, orient and scale while the Ctrl and Car trans group were selected. This meant that the car could now be controlled by selecting the circle object in the scene.
In order to understand different ways of doing the process seen above, the video shows you how to connect the rotate group of the car to the ctrl. This is done by making a new attribute for the control called skid. Once this is done I used the connection editor to assign the new attribute to rotate Y for the rotate grp.
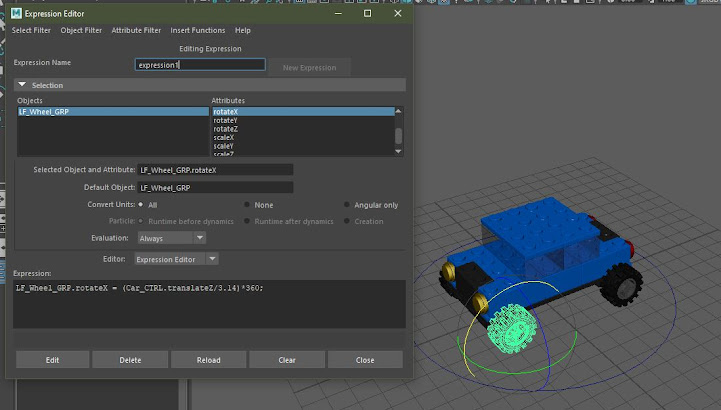
The final thing to do was to make it so the wheel rotated around when the car is moved forward. This was done using Mel code in the expression editor.
I've never rigged something before in Maya and so it was a very interesting process to go through. I was confused as to how this would work, however after following the video it is now a lot more clearer. I've never used the expression editor before and felt overwhelmed when I first saw it. However the code was broken down into simpler terms for me to understand and ones the first wheel was done it was just a matter of copying and pasting the code. I am happy with the results and feel the movement of the wheels in particular add a lot to the model.


Comments
Post a Comment