Posts

Showing posts from December, 2020

Introduction To Maya: Lighting And Colouring The Scene

Image
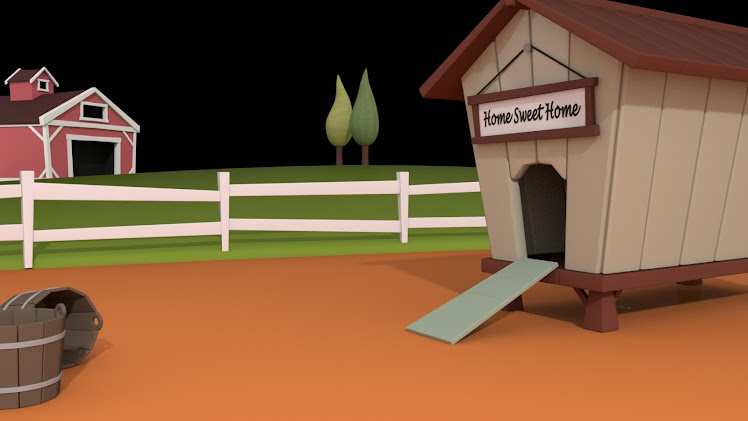
 To light the scene I created a Arnold skydome, which will light the entire scene. A directional light was also created just above the coop to act like the scenes sun. Its important that the scene you create is well lit as it effects how people view your image.  After lighting was done the video then instructed me to add materials to the assets to get a feel of what the scene will look like when it is fully textured. This allows you to see if the lighting need to be adjusted and helps to make sure you like what the scene will look like before putting time into creating the textures. 

Introduction To Maya: Set Construction

Image
 Now that all of the models have been made and their UV's have been unwrapped, I am now able to construct the farm scene. Using the ground plane provided as well as the video instructions, I was able to get roughly the same positioning as the original image. The trees and buckets imported in from the files.  I created a camera and lined it up like the image provided. Some of the assets had to be adjusted slightly to make sure everything was visible and looked good. 

Introduction To Maya: Creating The Scenes Floor

Image
 Today I made the ground for the farm scene. This tutorial mainly required that I adjust the plane until it fits with the image provided. I got to use the soft selection tool for the first time to create the bumpy look to the ground. This made the model more realistic as the ground is not naturally flat.  I also completed the UV's for this model so that it is ready to be textured. 

Introduction To Maya: Making The Fence

Image
 Today I made the fence for the farm scene. The fence was very simple to make as it is comprised of a series of cubes. The tutorial simply instructed me to create a image plane and then extrude out the cube until it matched the image. I copied the image as best as I could, however it did not need to be perfect as its meant to be a wonky old fence.

Introduction To Maya: Laying Out The Barns UV's

Image
 Today I continued with the farm scene by laying out the UV's for the barn. This was a lot simpler to do compared to chicken coop and I managed to get through it with no issues. This was down to the fact that I had improved on laying out the UV's from practice as well as the model being much simpler. The model is now ready to be put in the scene and textured.

What If Metropolis? Orthographs For Buildings

Image
 These are the orthographs for the hero building in the scene. I will use these 2D drawings to construct an accurate 3D version of my building in Maya.  To ensure that each drawing was the same, I used the guide tool in photoshop. It is essential that each drawing is on the same scale so when it come to putting the drawing into Maya for modelling, you will get the same size components.  Although I drew every side of the buildings in the orthographs, I wont actually have to construct every side. This is due to the fact that I only need to make the sides of the buildings the viewer is actually going to see. This saves time as well as reduces the amount of polygons in the scene. 

What If Metropolis? Improving Upon Concept Art

Image
 In a previous post I identified my hero props as the three buildings in front of the walls and the stalls I am happy with the buildings to the left and so can proceed with turning them into orthographic, ready to make into 3D. When it comes to the stalls however, I mentioned how I felt the stalls where a good representation in the concept art piece, but I don't feel they give off the effect to the city I mentioned in my travelogue. As I have been improving the lighting of my original concept art I also want to redesign the market place I decided to refer back to my research on food stalls. I then did some very quick thumbnails just to explore separate ideas I did not include in my original concept art. I tried to think about what sort of things I described in my travelogue and what sort of thing would be visually interesting to see in the image. Now that my concept art has been changed to night, it allows me to explore more concepts which surround light. I really like the idea of

Introduction To Animation: Throwing Animation

Image
  This week we were tasked with creating a throwing animation which showed anticipation. Anticipation is the moment before the ball is actually thrown. Its a visual cue which shows the view that an action is happening and is usually overexaggerated for the sake of the viewer. The results of the thrown are almost always dictated from the anticipation beforehand, prompting the viewer to expect a certain outcome. I started the task by attempting to complete a stick figure version of the animation. This however went  very poorly. I ended up adding too much build up to the throw by mixing my own ideas with the example animation provided. This resulted in a choppy animation which didn't make sense. I decided to try again, this time using a reference image for the key points in throwing a ball. I then added in additional frames to emphasis the anticipation. 

What If Metropolis? Matte Paintings And Hero Props

Image
 In a previous post I identified what I want to improve on as well as things I want to look at in further detail.  Firstly I want to look at the matte painting. Below I circled where I feel the matte painting should go. Matte paintings are used in films in situations where it would be either impossible, expensive, time consuming or hard to film a scene. The painting can either be hand drawn or photo bashed, to realise a backdrop to a particular scene. They are then integrated into the final cut to give off the illusion that the actor is really there. This was done a lot in the past due to limited technology as well as budget restrictions, but is also used a lot today. This is due to it being significantly cheaper and less time consuming compared to producing everything digitally. There are no moving parts on a matte painting and they are usually used far away, with a hero prop in the way to disguise the fact that its a drawing. A hero prop is something that has been built which is actu

Introduction To Illustrator: Creating A Comic Strip

Image
 Today I continued to work in Illustrator, creating two different comic strips. The first one came with the images already set up in a separate file and simply required me to position them in the correct place. This got me used to Illustrators ability to let you have assets off to the side of the screen. It also required me to make multiple different shapes to fit the grid and colour them appropriately. The next task required me to do the same thing, this time however I had to take the parts of the picture I wanted from the image myself and then apply it to the grid. To add the image to the grid you roughly line the image up until your happy and then go over the edge using the pen tool. Once you are happy with outline you then create a clipping mask. This was then repeated for the rest of the images. I took some of the Godzilla images into photoshop and edited them to fit the black and white art style of the other images at the start. Overall I feel even more confident using both Illus

What If Metropolis? City Annotation

Image
 The next step is to take the piece of concept art and annotate each part to investigate it in more detail. This will help me to complete my production art. Production art takes the intitial ideas found in the concept art and develops them further. You look at different interpretations of the original idea to find the best version it can be.        The brief states that it wants My key assets as production art Key assets as orthographic design sheets  Matte painting I will identify each of the above requirements through my annotation I added what I want to improve on as well as things I want to look at in further detail.