Posts

Showing posts from December, 2022

Minor Project: Setting Up The Scenes For The Pre-viz

Image
 For the pre-viz environment I already had a fair amount of assets from last year. However this time instead of making all of the models fit together as one large map, I instead want to recreate the animatic shot for shot.  When testing for how I can create my environment, I thought of using heightmaps. I found one online which I ended up using for the pre-viz.  Link To Website Where Image Was Found:  UE4 Heightmap Guide: Everything You Need to Know About Landscape Heightmaps for UE4 In terms of  environmental shots, the environment is only actually seen in all of the images below. This meant I could just recreate the shots seen below for the pre-viz. I also had the map I had made in order to help visualize the placement of objects in the environment.  The 1st shot required a tree which has the character sitting in it. I managed to make the tree by taking a cylinder and extruding it along an EP curve I had drawn. I then had to repeat this process every time I wanted to add a branch. I

Minor Project: Rigging Both Test Models

Image
 Today I brought both of the test models into the same scene and used Maya's auto rigger to rig and skin the character's.  I had never used this feature before so I watched a video in order to understand how it worked. After seeing how straightforward it was I completed both my characters. Before skinning I made sure to move the joints around to ensure they lined up with my character's.  I also coloured the characters using lamber's in order to get an idea what the full bodies of the characters looked like.  This process turned out to be quicker than I had imagined. I was surprised Maya had this inbuilt system which I had never even heard of which fulfilled what I needed to do perfectly. I am now able to begin testing my models through the pre-viz. 

Minor Project: Modelling The Cyberpunk Character

Image
Today I decided to complete the test model for the cyberpunk character. Below is the progress I had made on the character so far, however I remember being confused about how I was going to connect the model together. After completing the Samurai however I felt a lot more confident with modelling this character.  When it came to the characters legs, I decided to thicken them up in order to enable them to bend when rigged. I also moved the knees outwards so that they could bend properly.  Overall I am happy with the top half of the character. I didn't want to to add too much detail to the model as it is a test model. I feel the legs will look better when the model goes through the texturing process. My main goal was to make sure all of the elements work together when rigged so that I can return to the character and add in any additional details. 

Minor Project: Completing The Samurai's Head Model

Image
 Today I decided to return to modelling the Samurai's head. I added the back of the head by extruding up the back and then connecting it through the front. I had to add in an additional edge loop running through the head so that there was enough geometry. I then shuffled around the vertex's and used the relax tool until the model was smooth and matched my drawing.  Now that my character the back of his head I then referred back to one of the videos I used when previously trying to model my characters head. The video covers how to model a human ear, and although it is far too detailed to fit my model, I used the steps as reference until I was happy to finish the ear my own way.  Video Link:  Head Modeling Tutorial Part2 | Learn Maya At first I was unsure if I was even able to use this tutorial as my model does not have as many edge loops as the one in the video, however I thought it was worth a shot as I've never had to model an ear before. Fortunately I was able to use the

Minor Project: Modelling The Samurai's Upper Armour

Image
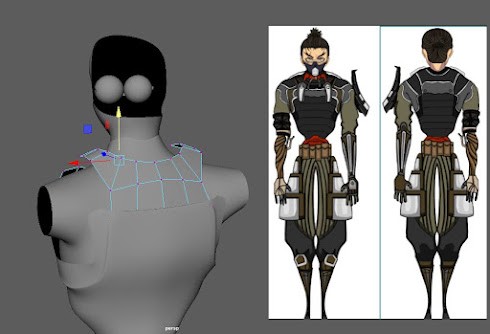
 Today I completed the upper armour for my character. I started by duplicating the body and scaling it up. I was then able to deleted the faces of the parts I didn't need.  I then did the same for the remaining parts of the character.  After finishing the upper armour I found it surprising how much such a simple thing added so much to the character overall shape. I really like how the character looks like he's wearing loads of different layers, particularly on the back, and cant wait to see what this looks like fully textured.  As for the other details in the armour I will add them either in the texturing process is done or once the test models have been tested. I fell as though this is enough detail to get an idea as to how the character will interact with the rig.