Posts

Showing posts from May, 2021

Toolkit 1: Friday Workshop Lessons (ALL LINKS)

 Adobe Photoshop Lessons: Introduction To Photoshop Introduction To Photoshop: Editing Photo's Introduction To Photoshop: Gif And Thumbnail Making Introduction To Photoshop: Learning Tools In Photoshop And Illustrator Introduction To Photoshop: Making A Matte Painting Part 1 Introduction To Photoshop: Making A Matte Painting Part 2 Adobe Illustrator Lessons: Introduction To Illustrator: Making A Pizza Slice Introduction To Illustrator: Creating A Comic Strip Adobe Audition Lessons: Introduction To Audition: Charlie Chaplin Audio Adobe After Effects Introduction To After Effects Adobe Premier Pro Premier Pro Padlet Link For Additional Work Under 'Ronnie' https://padlet.com/cpeters41/CAAyr1 Reflective Statement At the beginning of the course, I had very little experience with any of the software above. However after completing the tutorial lessons I now feel confident enough to use all of the software in order to produce  a piece of work. Proof of this is the many projects I&

Toolkit 1: Maya (ALL LINKS)

 Intro To Maya  Introduction To Maya: Lego Car Introduction To Maya: Texturing The Lego Car Introduction To Animation: Rigging The Lego Car Introduction To Maya: Lighting And Rendering The Lego Car Introduction To Animation: Finished Lego Car Animation Digital Sets Introduction To Maya: Chicken Coop Introduction To Maya: Creating The UV's For The Chicken Coop Introduction To Maya: Making The Barn Introduction To Maya: Creating The UV's For The Barn Introduction To Maya: Creating The Fence Introduction To Maya: Creating The Scenes Floor Introduction To Maya: Set Construction Introduction To Maya: Lighting And Colouring The Scene Introduction To Maya: Rendering The Scene (Finished) Lighting And Rendering 101 Introduction To Maya: Arnold Part 2, Sampling Introduction To Maya: Arnold Part 3, Ray Depth Introduction To Maya: Arnold Part 5, Maya Lights Introduction To Maya: Arnold Part 6, Light Filters Organic Modelling Introduction To Maya: Organic Modelling Introduction To Maya: Org

Toolkit 1: All Animation Lessons With Nat (ALL LINKS)

 Lesson 1, Face Morph -   Getting Used To Animation: Face Morph Task Face Morph Task (Continued) -  Getting Used To Animation: Animation Morph Task (Update) Face Morph Task (Continued) -  Getting Used To Animation: The Morph Task (Face To Mushroom) Face Morph Task (Final) -  Getting Used To Animation: Face Morph Task (Finished) Lesson 2, Timing And Spacing -  Animation: Pendulum, Timing And Spacing Lesson 3, Timing, Spacing, Weight, Arcs, Squash & Stretch -  Getting Used To Animation: Squash And Stretch Artist Review -  Lotte Reiniger, Don Hertzfeldt Lesson 4, Timing, Spacing, Weight, Arcs, Squash & Stretch, Follow Through & Overlapping Action   Introduction To Animation: Character Squash And Stretch Lesson 5, Walking Animation -  Introduction To Animation: Walking Animation Lesson 6, Running Animation -  Introduction To Animation: Running Animation Lesson 7, Throwing Animation With And Without Anticipation -  Introduction To Animation: Throwing Ball Lesson 8, Animating An

Introduction To Adobe Premiere Pro

 Masked Layers Blend Modes Inserting Clips

Introduction To After Effects

 Today we were introduced to the software, Adobe After Effects Started by importing the image of the space background and rocket into the scene and dragging it into the timeline. Then rescaled the two images to ensure that fit into the scene Next we began animating the rocket to make it fly around the planet. This was done by first positioning the rocket offscreen and key framing it by clicking the stopwatch icon on the position setting in the timeline. once the first key frame is done, the rest will automatically by implemented when the seconds and position is changed.  The animation can be played by either selecting the  Next to make the rocket face the right way you have to firstly rotate it in the way you want it to go and then select layer on the top of the screen, transform and then auto orient. This will then allow you to select the path option which will cause the rocket to follow the path.  This time we made the path first to make the animation a lot smoother. This is done by

Character Design: Heroes, Villain's And Sidekick's

Image
 Today was my first character design lesson. We started by learning about the  The first task was to take a well know Pixar character and change its art-style, while still keeping the fundamental which make the character iconic. I chose to do Woody from Toy Story. I attempted to draw him in a stylized, cartoon art-style.  As a second attempt with the same character, I tried drawing Woody as the comic relief character. This meant simplifying his features I learnt that strong characters are normally designed with square shapes, villain characters are designed with triangular shapes and friendly characters are made up of circular shapes. This is because squares are solid, heavy looking shapes, triangles are pointy, sharp, looking shapes and circles are safe looking shapes.  With this in mind, the next task required that I took Woody and attempt to turn him into one of the three types of characters, using the information learned. I decided to make woody look like a villain. I made his chin

Character Design: Props And Locations

Image
  In todays lesson we looked at props and locations for characters. For the first task I got the theme of Greek warrior. I had to draw tools which would be associated with the character. This was hard as I dont normally draw Greek objects, however also made it more interesting as I had to think more carefully. I based my designs off of Greek mythology. Justin explained that I should try to avoid drawing generic props and give them a deeper meaning in their use.  After designing the props the character would use I then had to design where they would live. I had to take into consideration what their personality might be like and what I think they would be doing.  For the last task I had to humanise props found in the room of a house. I chose the kitchen. I attempted to humanise an oven, making its personality angry. The pots are meant to look like its eyebrows, the door is its mouth and the buttons are its eyes. When it gets angry the pots on its head boil. 

Character Design: Animal Anatomy

Image
 Today we looked at animals and how their anatomy works. Justin broke down the fundamentals which make up an animal and then tasked us with drawing the animal he assigned to us. I got a rhino as my animal. I found an image of a rhino online and began drawing. I broke up its key joints to start with in order to get an understanding of its size. I then connected the joints with lines and fleshed it out.  Justin then explained that many mythical creatures found in character design are mainly derived from animals in real life. I was then assigned 2 animals, a Polar Bear and an Otter, and had to turn them into one creature. This was harder than it seemed, especially considering the difference in the two animals. I decided to identify a common theme between the two which I could use to link into its design. I found that both animals are suited to swim in water and so I could use this idea in the design. For the final task I had to make an animal which was suitable for an artic environment. T

Life Drawing Lesson 3

Image
  On the left of the image below is the warmup drawing I drew while waiting for people to turn up for the session. After that we had a demonstration explaining the task. This would have us draw without letting the charcoal leave the paper. My attempt at this is to the right of the image below. I found it to be harder than it seems, especially with the pose the model was doing.  Below is a 30 minute drawing I did of the life model. I tried to use different tones in the drawing in order to display shape. Below is a 15 minute drawing.  For the last task we had to split up parts of the models body into individual islands. This was to help with coordination as it required you to visualize how far apart each island would be from one another in order to complete the drawing. We were encouraged to constantly switch between each island in order to give a fresh perspective on what we were drawing and then correct any mistakes. 

Life Drawing 4

Image
 In todays life drawing lesson we alternated between two different tasks. For the first task we were given 30 mins to draw the life model in different poses. For the second task we had 1 minute to draw the model in different poses.  We alternated between the two tasks throughout the day and I managed to produce a lot of drawings as seen below. I feel my approach to drawing the 1 minute drawings, effected how I drew when I had 30 minutes. As I had such a short amount of time, I had to focus on the essential shapes I could see and draw the quickly. This meant when I had 30 mins I still looked at the same essential shapes, however this time actually had enough time to improve upon them, forming a more complete drawing. I feel this task greatly helped me with my observational skills. 

Intro To Maya: Lighting And Rendering The Lego Car Scene

Image
 Now that the car had been fully animated, the last thing to do was to fix the lighting for the scene and prepare the settings for the render.  To light the scene I followed the videos instruction and used the Arnold sky dome provided. This gave natural looking light to the scene. I turned down all of the render settings which were unnecessary, this would make rendering quicker.

Life Drawing 2

Image
 This is the warm up drawing I drew while waiting for everyone to turn up.  Today we did a drawing exercise where we had 1 minute to draw a pose and then it would be switched. The two poses would then be alternated every minute and this was done 6 times, with each pose being seen 3 times. You had to correct your drawing each time the position was changed back as the pose was never exactly the same.  We now did this exercise again, this time only having 30 seconds to draw. we were told it didn't matter how the drawing turned out, but instead for you to realize how you draw. This helps to identify any mistakes to may be making. I had 5 minutes to draw the images below.  I had 15 mins for each of the drawings below. This time I didn't want to focus on shading and really tried to focus on the shapes of the body. 

Introduction To Maya: Finished Lego Car Animation

Image
 Today I completed the video tutorials animating the Lego car. Below is the fully rendered scene.  After rendering the scene, I then took it into after effect in order to add motion blur. However I could not upload the video of this as Its too large so I took a screenshot.  overall I am happy with the model and feel like my Maya skills have improved by following this tutorial. 

Introduction To Maya: Arnold Part 06 Light Filters

Image
 This tutorial taught me how to apply different filter to the lights in my scene. This can be used in order to create different effects for rendering. 

Introduction To Maya: Arnold 05 Maya Lights

Image
 This video talks you through all the different lights in Maya and how they can each be used when rendering with Arnold The first render was done using a point light, which lights the scene from the centre and slowly falls off into the background. In order to make the light bright enough in the Arnold render I had to change the exposure to 8 under the Arnold tab in the lights settings.  The video continues to talk about all of the basic settings which apply to all the lights in Maya. Maya area light Maya Spotlight

Introduction To Maya: Arnold Part 3 Ray Depth

Image
 This video looks at ray depth and how that effects the rendering process The problem with the rendered image is that the glass is not acting the way it should. You cannot see the other glass in the background. This is due to a limited ray depth in the scene. To fix this I had to change the settings in the ray depth tab in the Arnold render settings in order to fix this. I changed the transmission setting to 12 and the total to 14

Introduction To Maya: Arnold Part 2 Sampling

Image
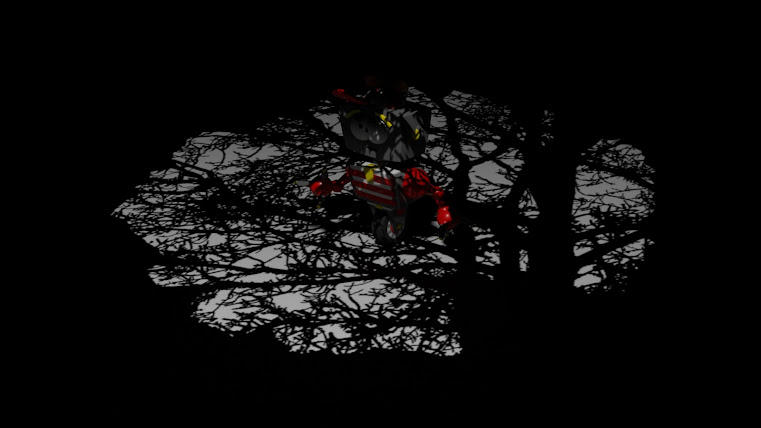
 Firstly I rendered the scene before changing any of the settings. This allowed me to see what issues there were to help me understand what settings needed to be changed. There was a lot of noise in the image, particular on the robots leg.  I found this image very useful in order to understand the Arnold render settings In order to get rid of the image noise, the first thing done was increasing the samples on both of the lights in the scene.  After finishing the tutorial I now have a clear understanding of what sampling is and how to fix the noise when rendering an image. 

Introduction To Maya: Applying Textures

Image
 This tutorial taught me about what each textures does and how to apply it. I had to tweak the settings in order to make sure the render was as optimal as possible.